It was an exemplary performance by Unai Emery‘s Aston Villa – there is something in the air at Villa Park these days, one of excitement, one of renewed hope, and a sense of a team on the rise.
Aston Villa moved just 4 points off the top summit and a single point behind Liverpool in the top 4 as they beat West Ham 4-1 who themselves have had a good start to the season though slowly have lost steam in the last few fixtures.
With this victory, Villa have now emerged as one of the biggest threat to teams such as Newcastle, and Manchester United who are chasing a way back to the top 4 and much of that credit goes to Emery’s ability to get the most out of the squad. So how did he demolish Moyes’s West Ham?
Aston Villa in Possession:
Emery’s fluid 4-2-2-2 reaped rewards against Moyes’s 4-2-3


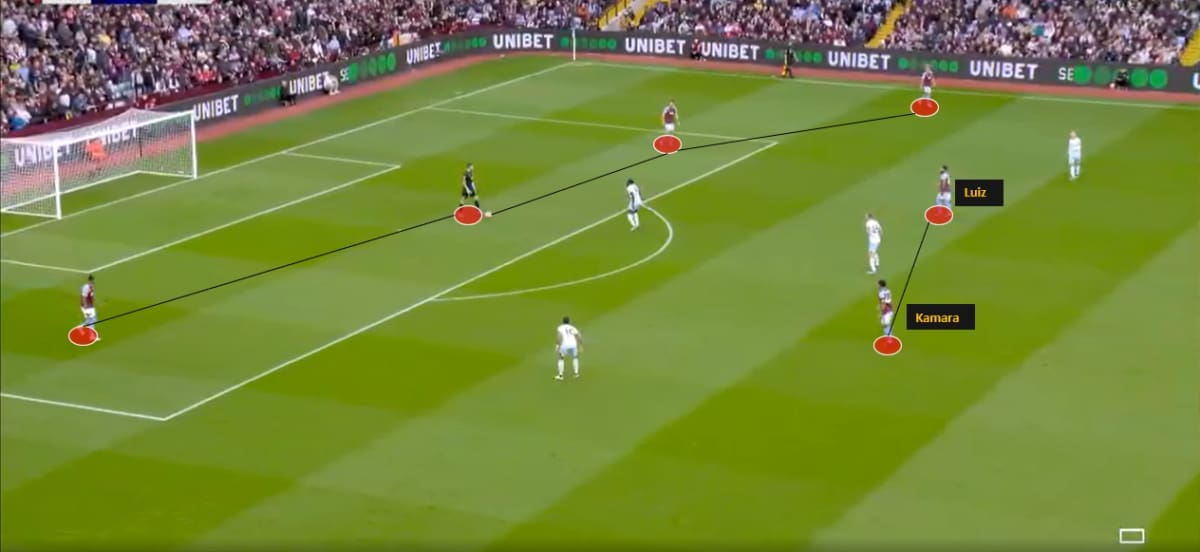
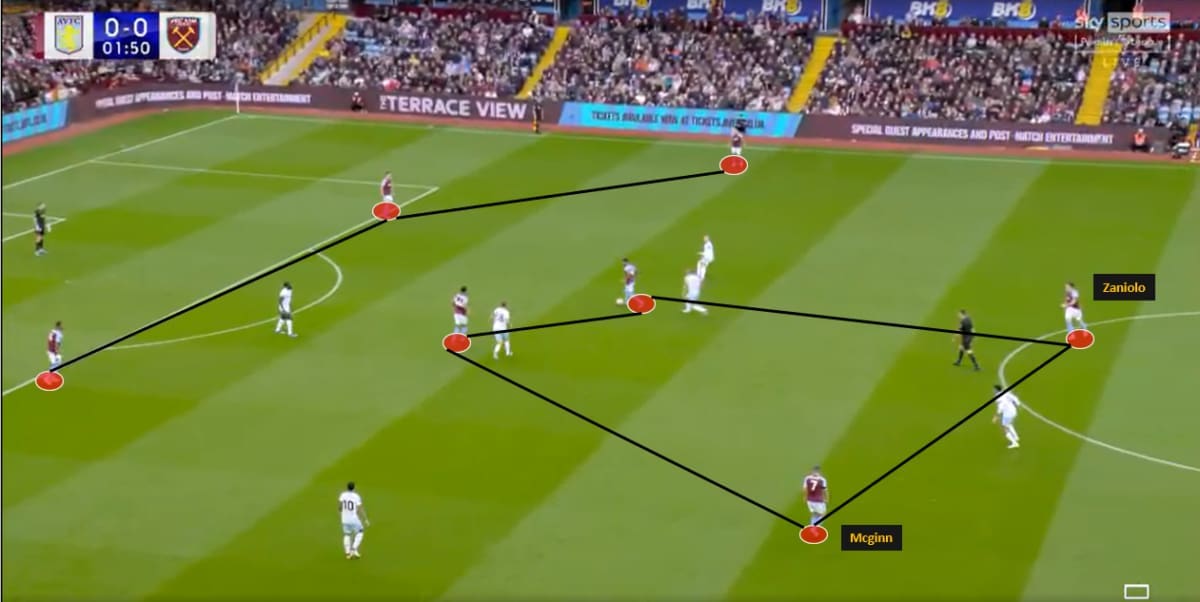
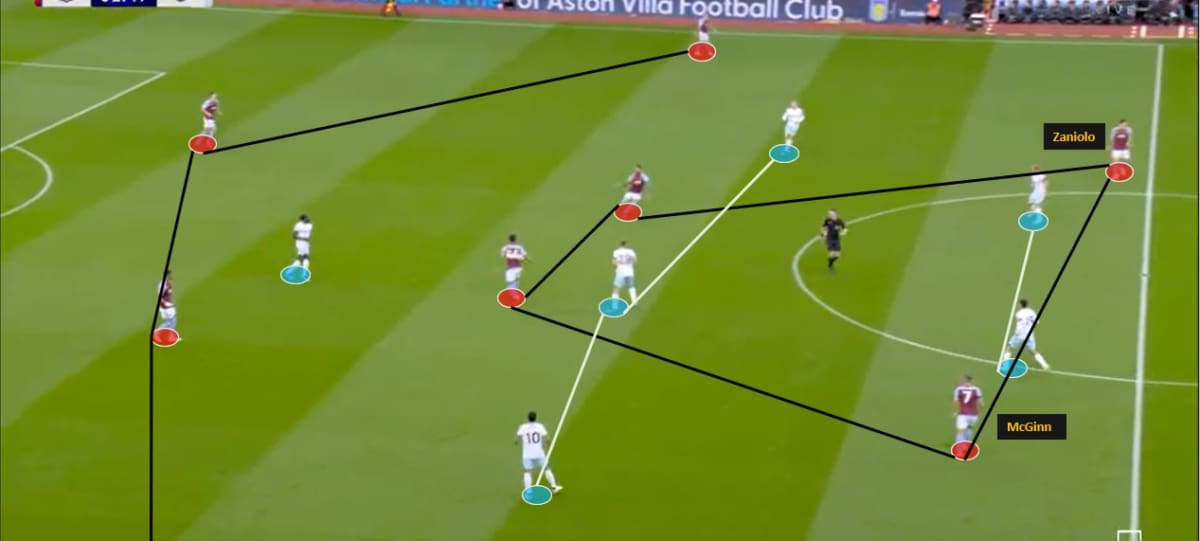
Pics 1, 2, 3: Emery’s Villa settled and 1st phase structures
Emery’s 4-2-2-2 with Zaniolo and Mcginn at the top of the midfield box with a base provided by the Kamara-Douglas Luiz duo ensured a dynamic advantage even if Moyes’s 4-2-3-1 could provide a 5v4 midfield advantage, the usage of GK Martinez in buildup was very well orchestrated to escape the pressure of West Ham.
Both Zaniolo and Mcginn could drag and drop to compress or stretch the pitch with Watkins and Diaby comfortable with rotating (Diaby had freedom to rotate and cut inside from right where Mcginn played). This ensured that West Ham’s pivots would generally be displaced which in-turn creates spaces in the centre.
Vid 1: Douglas Luiz’s Goal, the opener of the game
The idea of having Watkins drift wide to create separation around the box centrally worked well for Aston Villa. In the video above, for example, Douglas Luiz steps back initially as Zaniolo makes the run inside the box during which space in front of the box is created. The cue for Luiz is then to occupy that space which he does so brilliantly as he dispatches the goal past Areola.

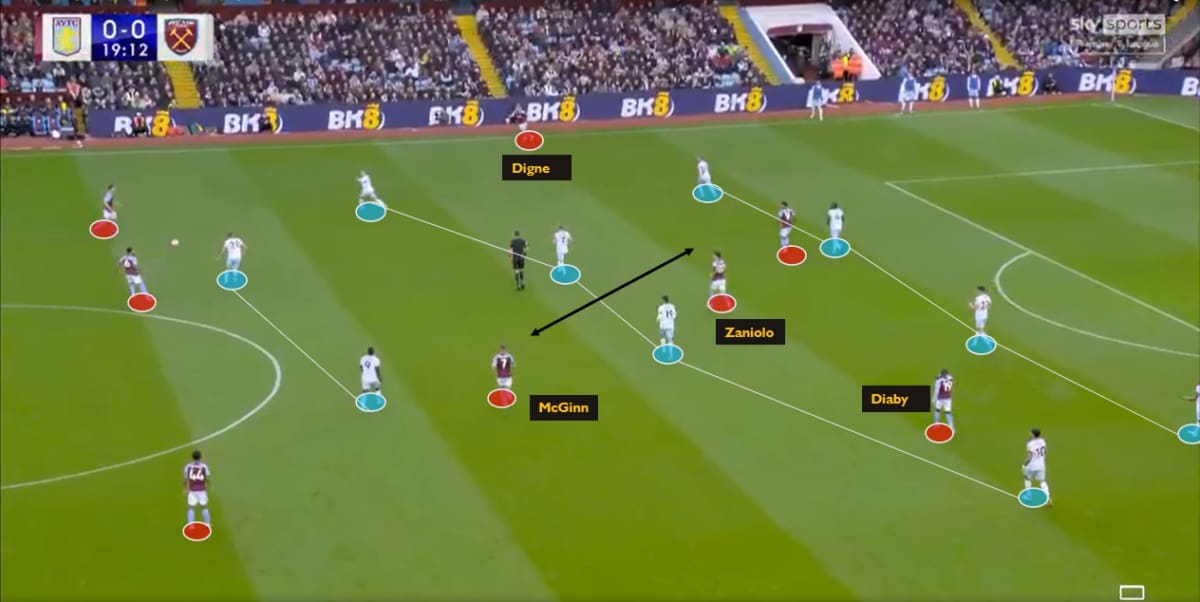
It’s also important to note that Emery cleverly adjusted to David Moyes’ tactics, recognizing that a more stable defensive formation would lead to a compact 4-4-2 block. This setup played to Emery’s advantage as, in the later stages, Villa adopted a 3-2-2-3 formation with Digne and Cash providing width. This allowed Diaby, Zaniolo, McGinn, and Watkins to work together, with Kamara playing a role in the defensive structure, enhancing their ability to avoid transitioning play.
In Pic 4, for example, having players between lines allowed to disrupt the 4-4-2 structure, and Aston Villa were in ways unlucky not to get that 2nd goal in 1st half. But in 2nd half, the Watkins drifting wide yielded goals as this time Watkins put up a scintillating finish to kill the game.
Vid 2: Watkins’ goal against West Ham that sealed the game
It’s worth noting that West Ham faced difficulties in dealing with transitions, particularly on the flanks. Watkins effectively exploited the gap between the right-back and center-back, mirroring the situation described during Villa’s first goal. His ball-holding skills and the synchronized runs of his teammates contributed to the West Ham defenders’ confusion, making it challenging for them to prevent the impending transition.
Aston Villa out of Possession:
The rigid Emery 4-4-2 block that limited West Ham well


Pics 5, 6: Emery’s 4-4-2 block.
Within the framework of West Ham’s 4-2-3-1 formation, notably visible in Pic 4, Emery made the tactical decision to implement a 4-4-2 structure. In this arrangement, the two strikers were instructed to shadow and mark Ward-Prowse and Alvarez, effectively blocking central progression. This strategy forced West Ham to focus on building their attacks out wide, aligning with Emery’s goal of confining their movements to the flanks and capitalizing on quick transitions.
The evidence was seen in Vid 1 when Watkins and Zaniolo could receive deep in the wide areas once they could breakthrough. With that, the spaces in centre could open as described before and this largely affected the performances of Alvarez and Ward Prowse. This also had to force Paqeuta to drop deeper and deeper to make contacts with the ball, and largely left West Ham to scramble to create quality chances.

Once Villa took the lead, Emery displayed his tactical acumen by transitioning to a 5-3-2 or 5-4-1 formation when West Ham advanced with four players. This strategic adjustment allowed Villa to maintain a numerical advantage while effectively frustrating West Ham’s attempts to create scoring opportunities. Despite an unfortunate deflection that led to Jarod Bowen’s goal, Emery’s tactics largely succeeded in maintaining control of the game.
Conclusion
With this victory, Aston Villa now sit at a comfortable 5th place on 19 points and have the required momentum to be a contender in the top 4 chase. Unai Emery’s team possesses the necessary squad depth to effectively balance their European commitments while maintaining a strong presence in the Premier League standings.
For Moyes, despite high expectations following the initial games, West Ham’s form has significantly deteriorated. This has placed Moyes under renewed pressure, sparking the familiar cycle of fluctuating confidence among the Hammers’ fans in his ability to lead the team. It remains to be seen whether he can guide West Ham back to their previous form.

